Ethereum Blockchain Block Raw Data in brief
缘起
由于最近在看智能合约相关内容,但一个对区块链有一些隐约的困惑,没有一个感性的认识。于是有了想分析区块内容的想法,以便能更深刻的认识区块链。其次最近简单学习了以太坊区块数据的格式,做个简答小结。主要资料可参考 Ethereum Wiki
区块格式
以太坊区块格式
主要参考这里
一个完整的区块定义格式是这样的
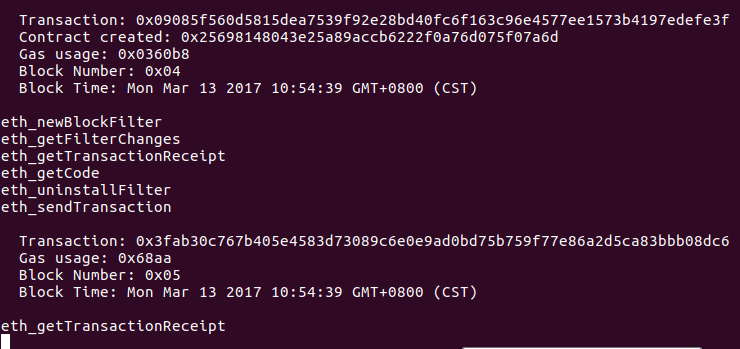
比如一个私链上的创世块是这样的
每个transaction 和uncle_block_header 都是一张表。工作量证明数据是区块数据去除掉nonce(交易数)后的RLP编码。
uncle_list 和 transaction_list 分别是叔区块头和区块里的交易构成的表。nonce 和 extra_data 都被限制为最大32字节,除了在创世区块中参数extra_data会更大。
state_root 是一个包含所有地址的(key, value)对的默克尔-帕特里夏树(Merkle Patricia tree )的根, 其中每一个地址都由一个20字节二进制字符串表示。对于每个地址,储存在默克尔-帕特里夏树的 value 字段是一个对以下格式对象进行RLP串接编码形成的字符串:
[ balance, nonce, contract_root, storage_deposit ]
nonce 是该地址的交易数,每做一次交易都会增加1。其目的是(1)使每个交易只有一次合法的机会以防范重放攻击,(2)使得构建一个和已存合约有相同哈希的合约成为不可能(更准确地说,密码学意义上不可行)。balance 指的是合约或地址的平衡账目,以伟为单位。contract_root 是另一个帕特里夏树的根,在该地址被一个合约控制的情况下包含该合约的内存。如果一个地址没有被一个合约控制,contract_root 就会是一个空字符串。storage_deposit是一个计数器,储存花费的储存费用
注 RLP 递归长度前缀编码 (recursive length prefix encoding,RLP)
这种编码格式将任意长度和维度的字符串构成的数组串接成字符串。例如,[‘dog’, ‘cat’]被串接 (以字节数组格式) 为 [ 130, 67, 100, 111, 103, 67, 99, 97, 116];其基本的思想是把数据类型和长度编码成一个单独的字节放在实际数据的前面(例如‘dog’的字节数组编码为[ 100, 111, 103 ], 于是串接后就成了[ 67, 100, 111, 103 ].)注意RLP编码正如其名字表示的一样,是递归的;当RLP编码一个数组时,实际上是在对每一个元素的RLP编码级联成的字符串编码。需要进一步提请注意的是,以太坊中所有数据都是整数;所以,如果有任何的以一个或多个0字节开头的哈希或者地址,这些0字节应该在计算出现问题的时候去除。以太坊中没有串接数据结构包含任何以0开头的数值。整数以大端基础256格式存储(例如32767字节数组格式为[ 127, 255 ])。
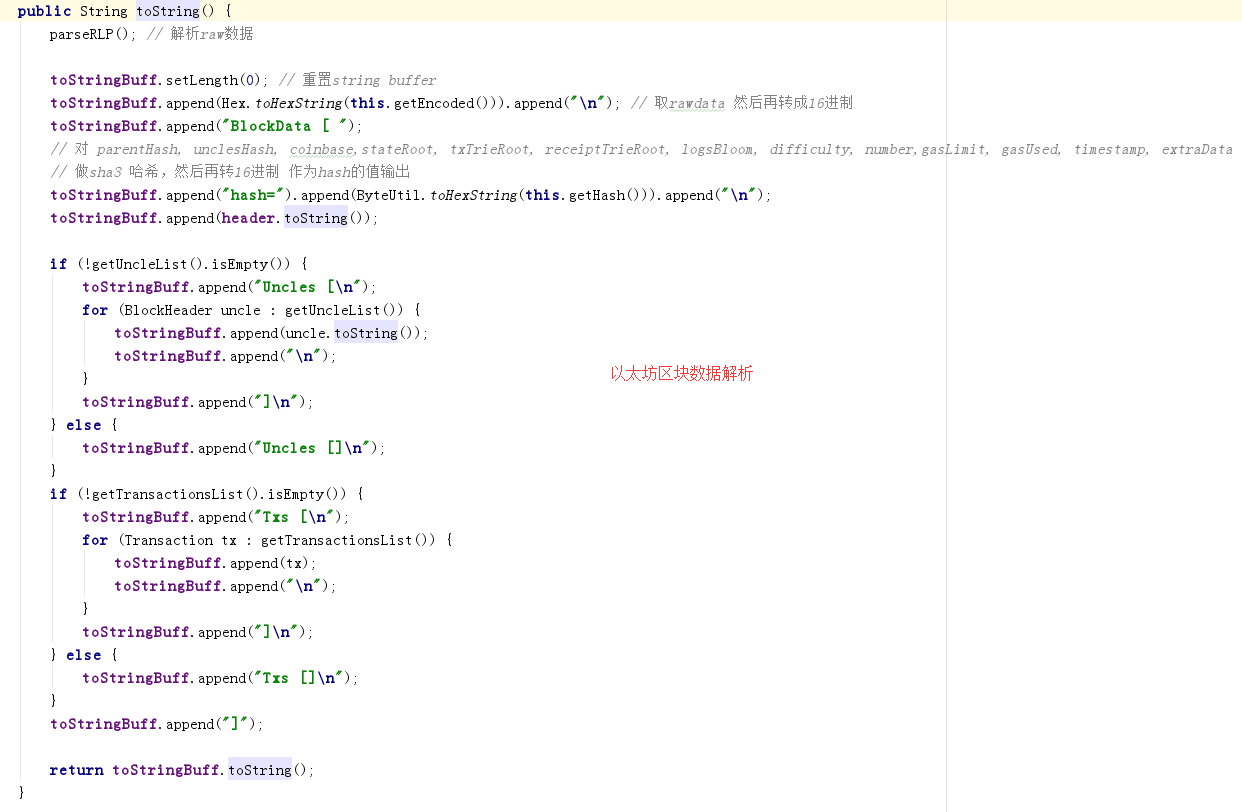
详细代码可以参考ethereumj中Block的代码部分
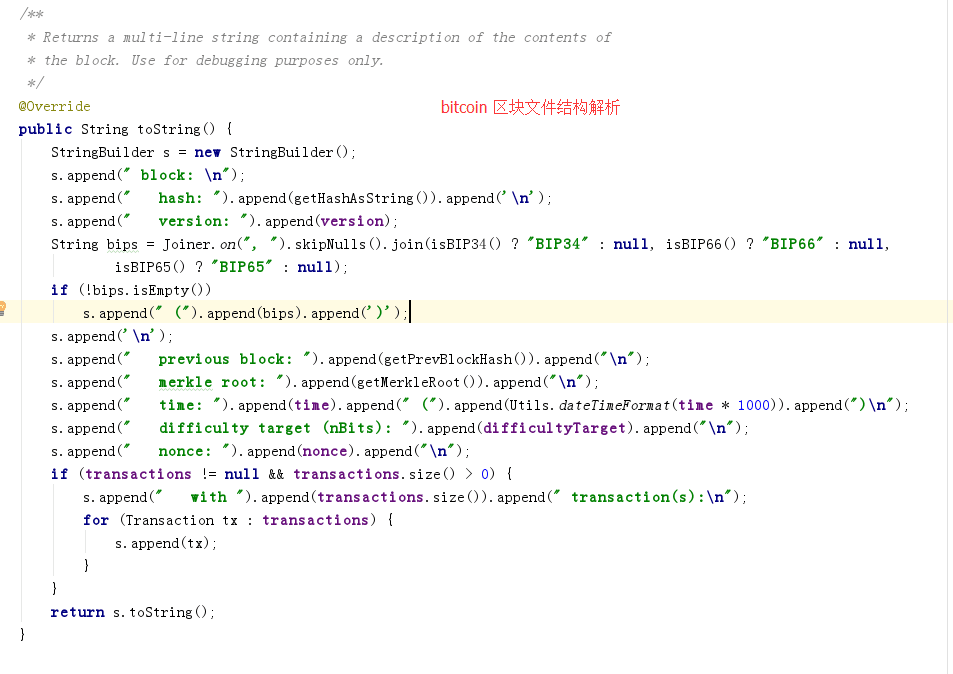
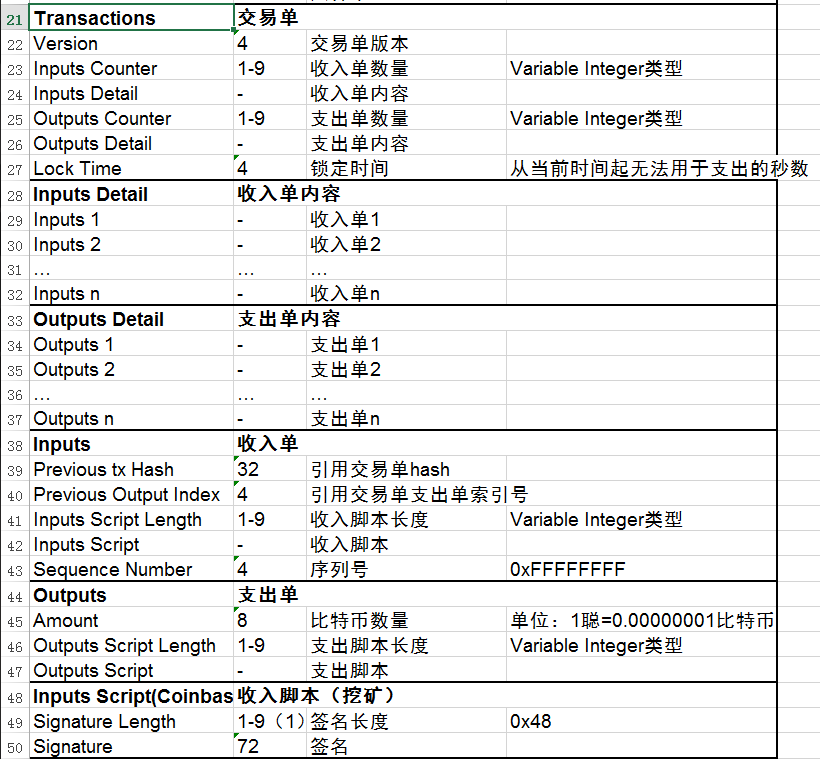
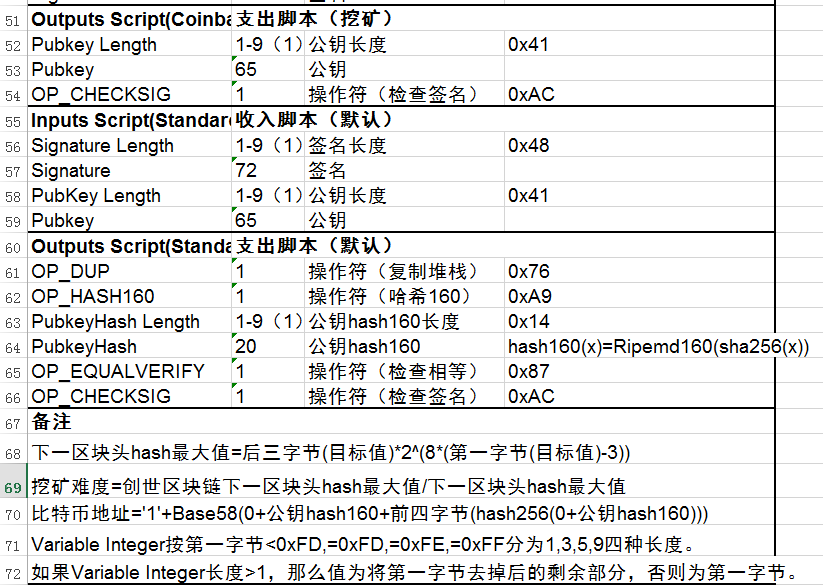
bitcoin 区块格式
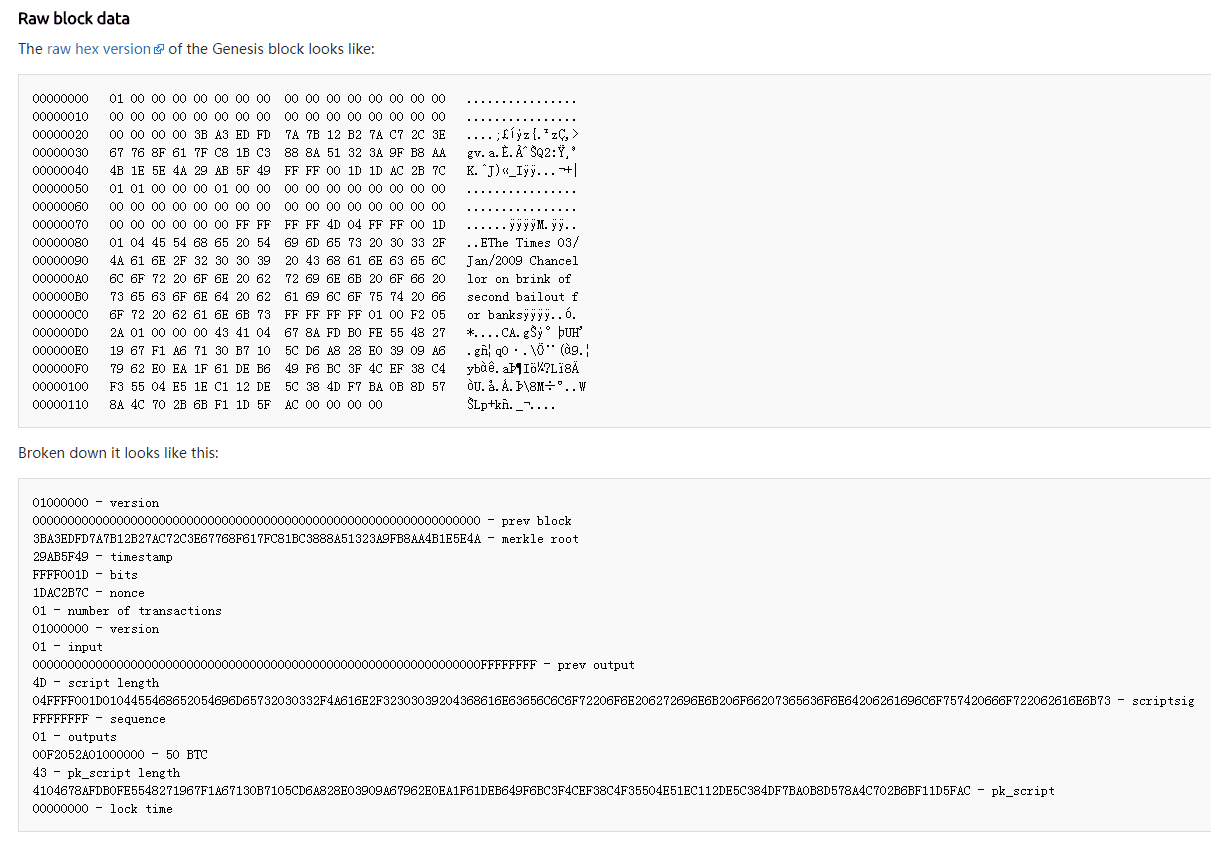
关于bitcoin的区块格式,已经有前人做了分析大致结构如下
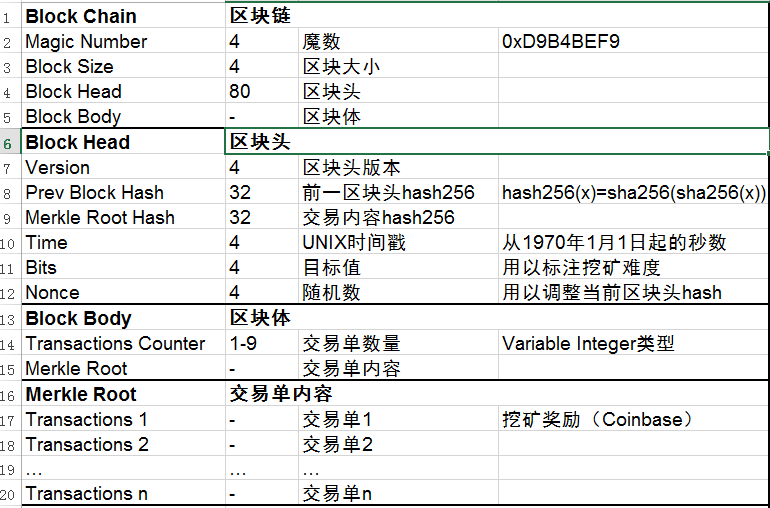
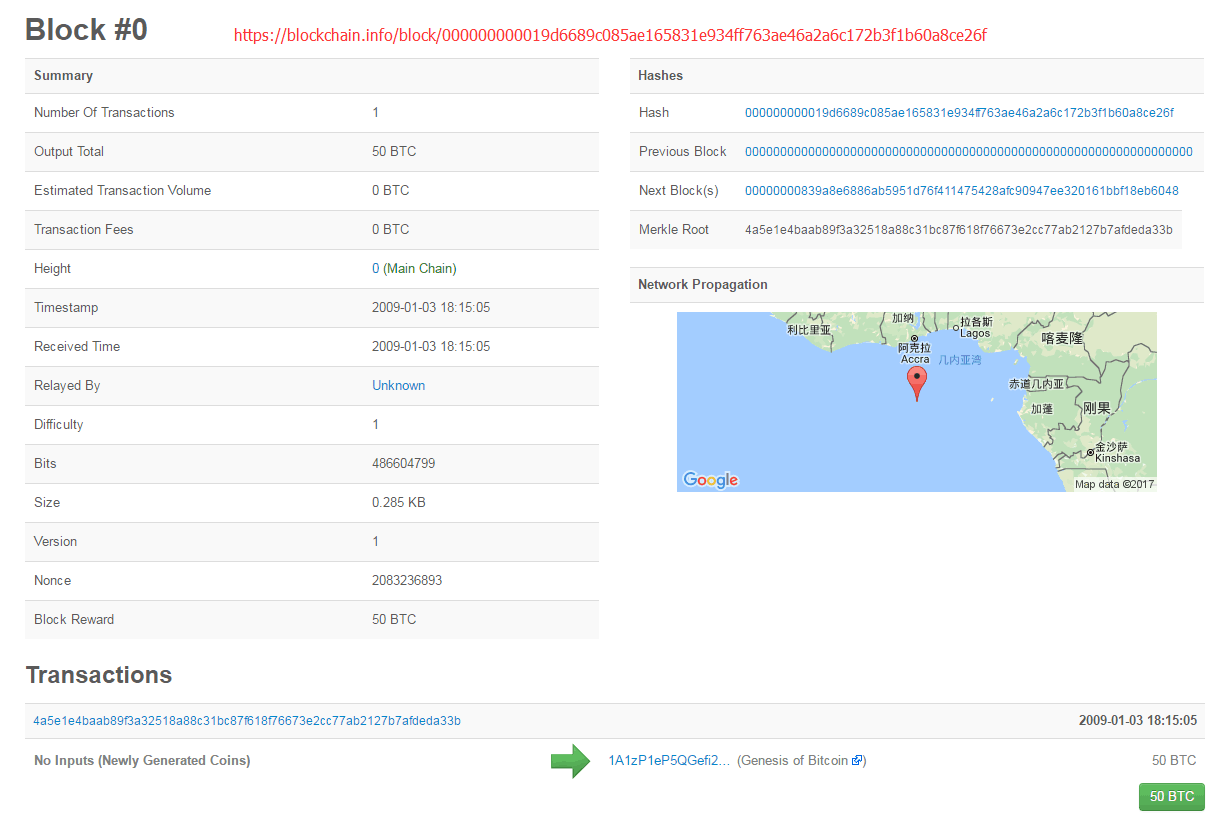
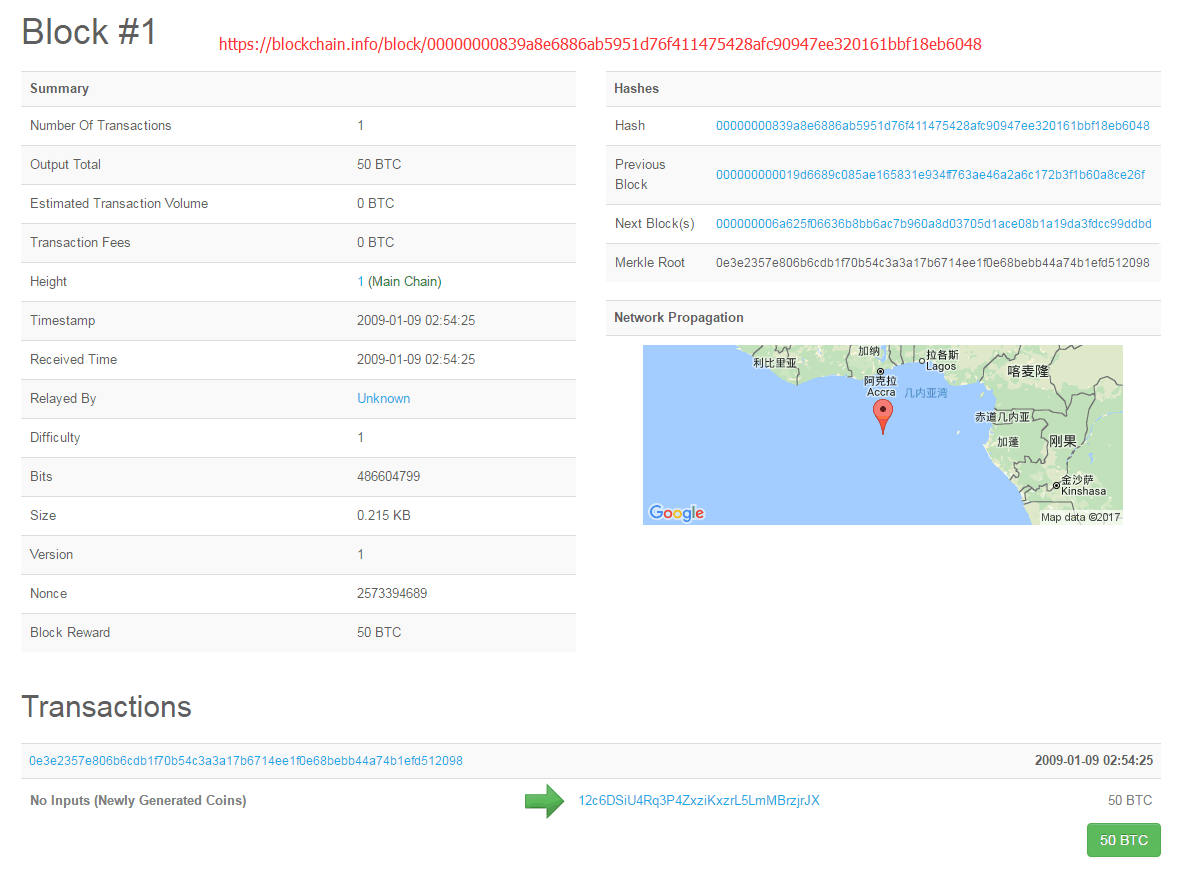
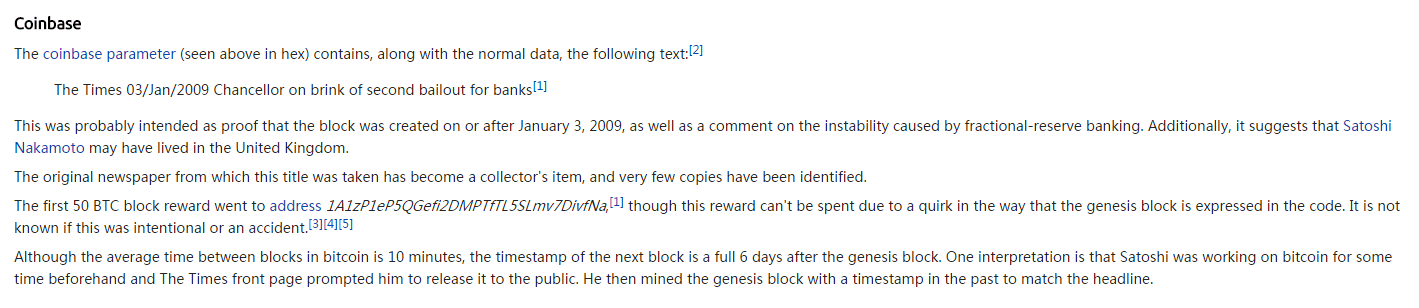
比特币创世区块是这样的
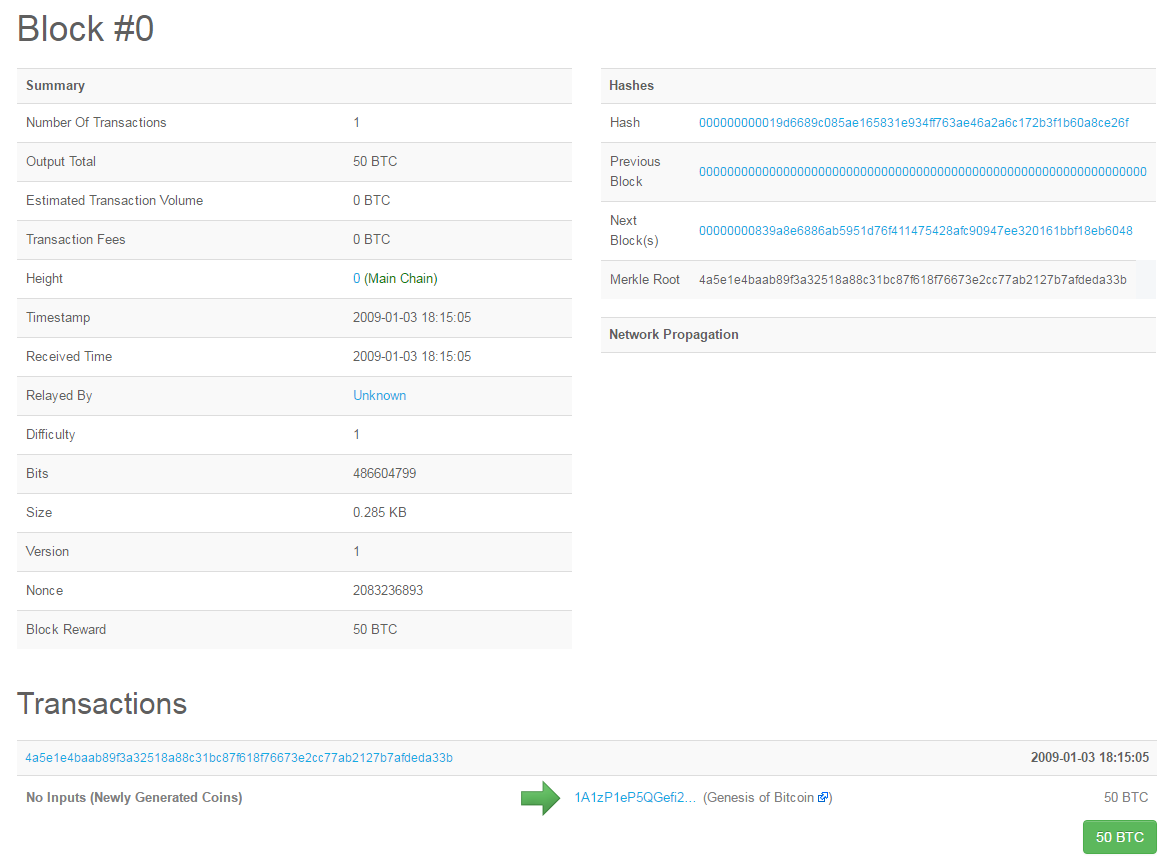
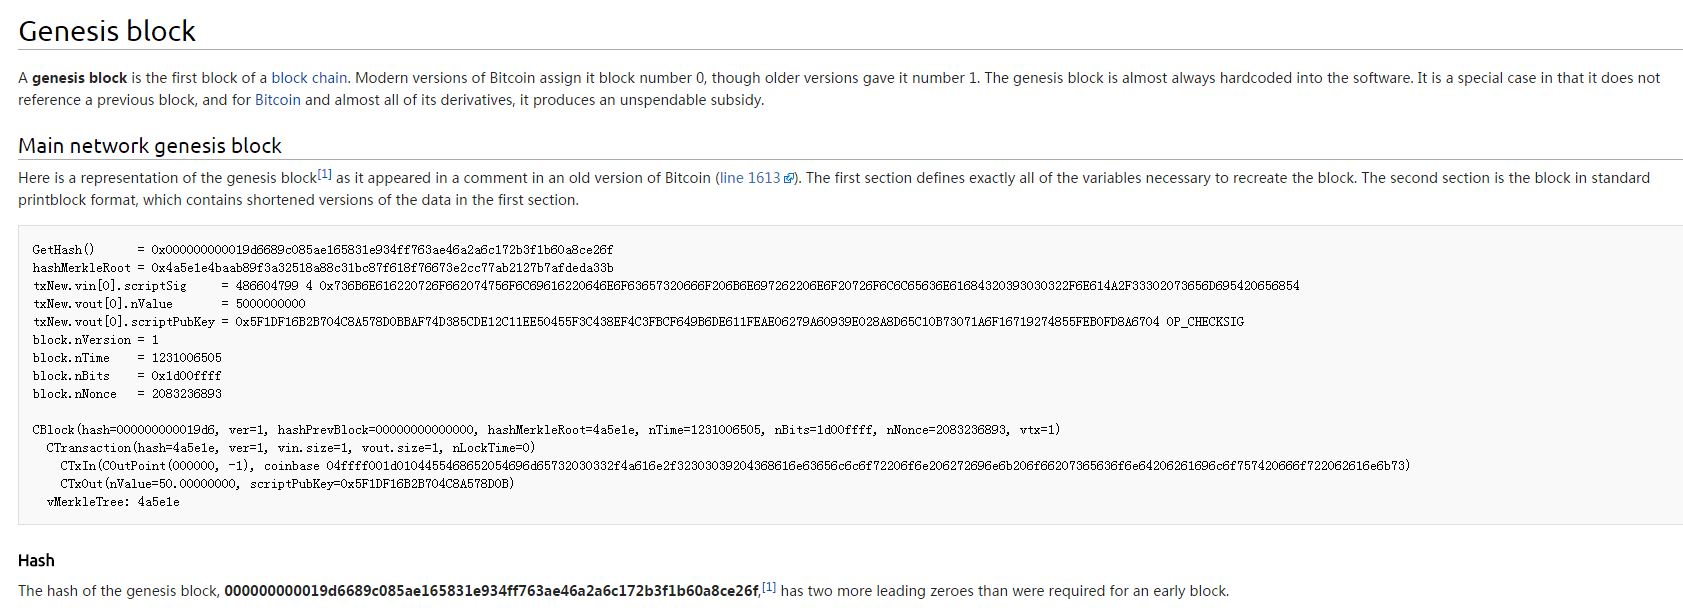
关键代码在 bitcoinj 的Block的代码